Image to Layers Guide: Separate Image Elements Easier to recreate by your thought
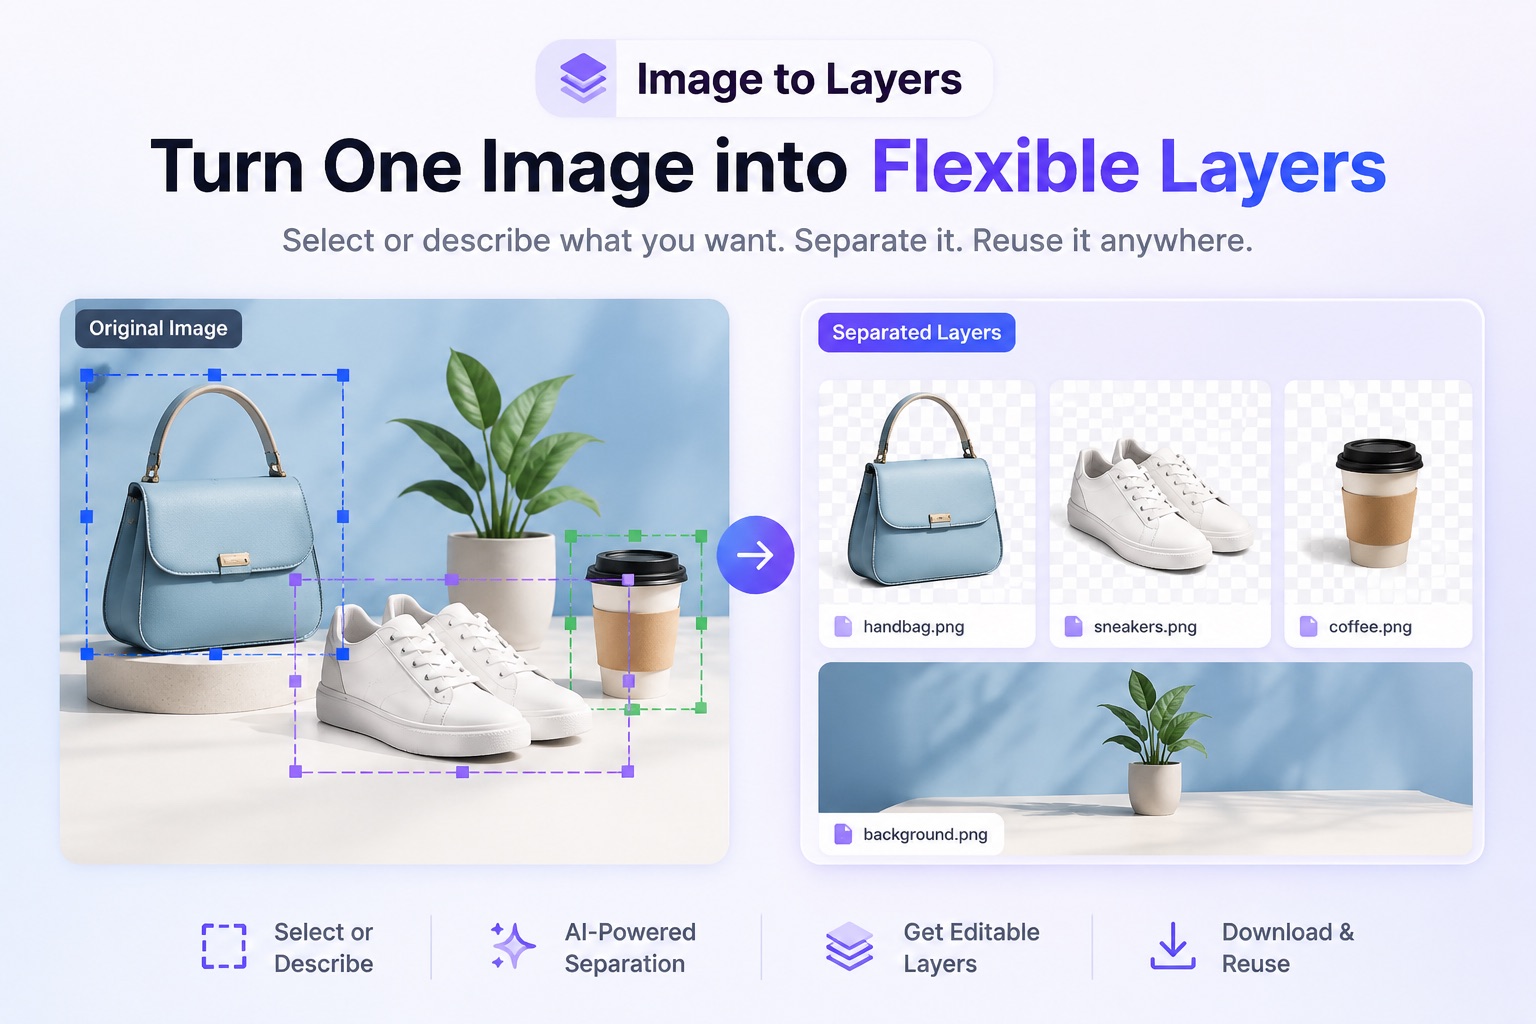
A flat image can be difficult to reuse, adjust, or recompose, while manually cutting out individual elements—especially those with fine edges or overlapping objects—can take considerable time. With image to layers in Piceditor.ai, you can upload an image, select one or more elements with the selection tool or describe them in a prompt, and let AI separate them from the rest of the picture.
What Is Image to Layers?
Image to layers is an AI-powered feature from Piceditor.ai that separates selected visual elements from a flat image.
Instead of breaking an entire image into a fixed set of layers automatically, you can guide the result by choosing what you want to extract. There are two ways to do this:
- Use the selection tool to draw a box around one or more elements.
- Enter a prompt describing the element or elements you want.
Piceditor.ai then analyzes your selection or prompt and separates the requested elements from the other parts of the image. For example, you could isolate a person, product, accessory, foreground object, or another visible element while keeping the remaining image content separate.
How to Use Image to Layers
With image to layers, you can select one or more elements from an uploaded image—or describe what you want with a prompt—and separate them from the rest of the picture.
Step 1: Choose a Suitable Source Image
For better results, choose an image with:
- A clear and recognizable subject
- Visible separation between the subject and background
- Good lighting and contrast
- Minimal motion blur
- Clearly defined object boundaries
Complex images can also be processed, but overlapping objects, detailed backgrounds, transparent materials, and small elements may require more precise selections and closer inspection.
Step 2: Upload and Preview Your Image
Check that the entire image is displayed correctly and that the elements you want to separate are clear and visible.
Step 3: Select or Describe the Elements You Want
After uploading the image, tell the AI which elements you want to separate. You can use the selection tool, enter a prompt, or combine both methods when needed.
Select Elements with the Selection Tool
Use the selection tool to draw a box around the element you want to extract. You can select a single element or mark multiple elements in the same image.Try to include the complete object inside each selected area while avoiding unrelated parts of the image.
This method works well when:
- The desired object is clearly visible
- You know exactly which area you want to process
- You want to select multiple objects from the same image
- The image contains several similar elements
Describe Elements with a Prompt
You can also enter a prompt describing the element or elements you want to separate. Use specific visual details such as the object's color, position, material, appearance, or type.
A specific description such as the red handbag on the table is more useful than a broad prompt such as bag, especially when the image contains several similar objects.
Step 4: Run Image to Layers
Once you have selected the desired areas or entered your prompt, click the creation button to begin processing.
The AI will analyze the source image and your instructions, then separate the requested elements from the remaining visual content. Instead of keeping everything merged in one flat image, image to layers generates individual pieces that can be reviewed, downloaded, and reused.
Step 5: Review the Separated Results
If the result does not match your intention, refine the selected area or rewrite the prompt with clearer visual details. For example, adding an object's color or location may help the AI distinguish it from similar elements.
Step 6: Download the Layers You Need
After reviewing the results, download the separated layers you want to keep. Each element can be saved individually and used as a visual asset in another project. If necessary, piceditor.ai is a good option.
Image to Layers Use Cases
Create New Product Images
Separate a product from surrounding objects, then use it as part of a new marketing composition. This can help when preparing different visuals for campaigns, product highlights, or social media content.
Build New Compositions from Existing Elements
Separate several useful objects from an image, then rearrange or recombine them into a different visual concept. Image to layers gives creators a faster starting point than rebuilding every element manually.
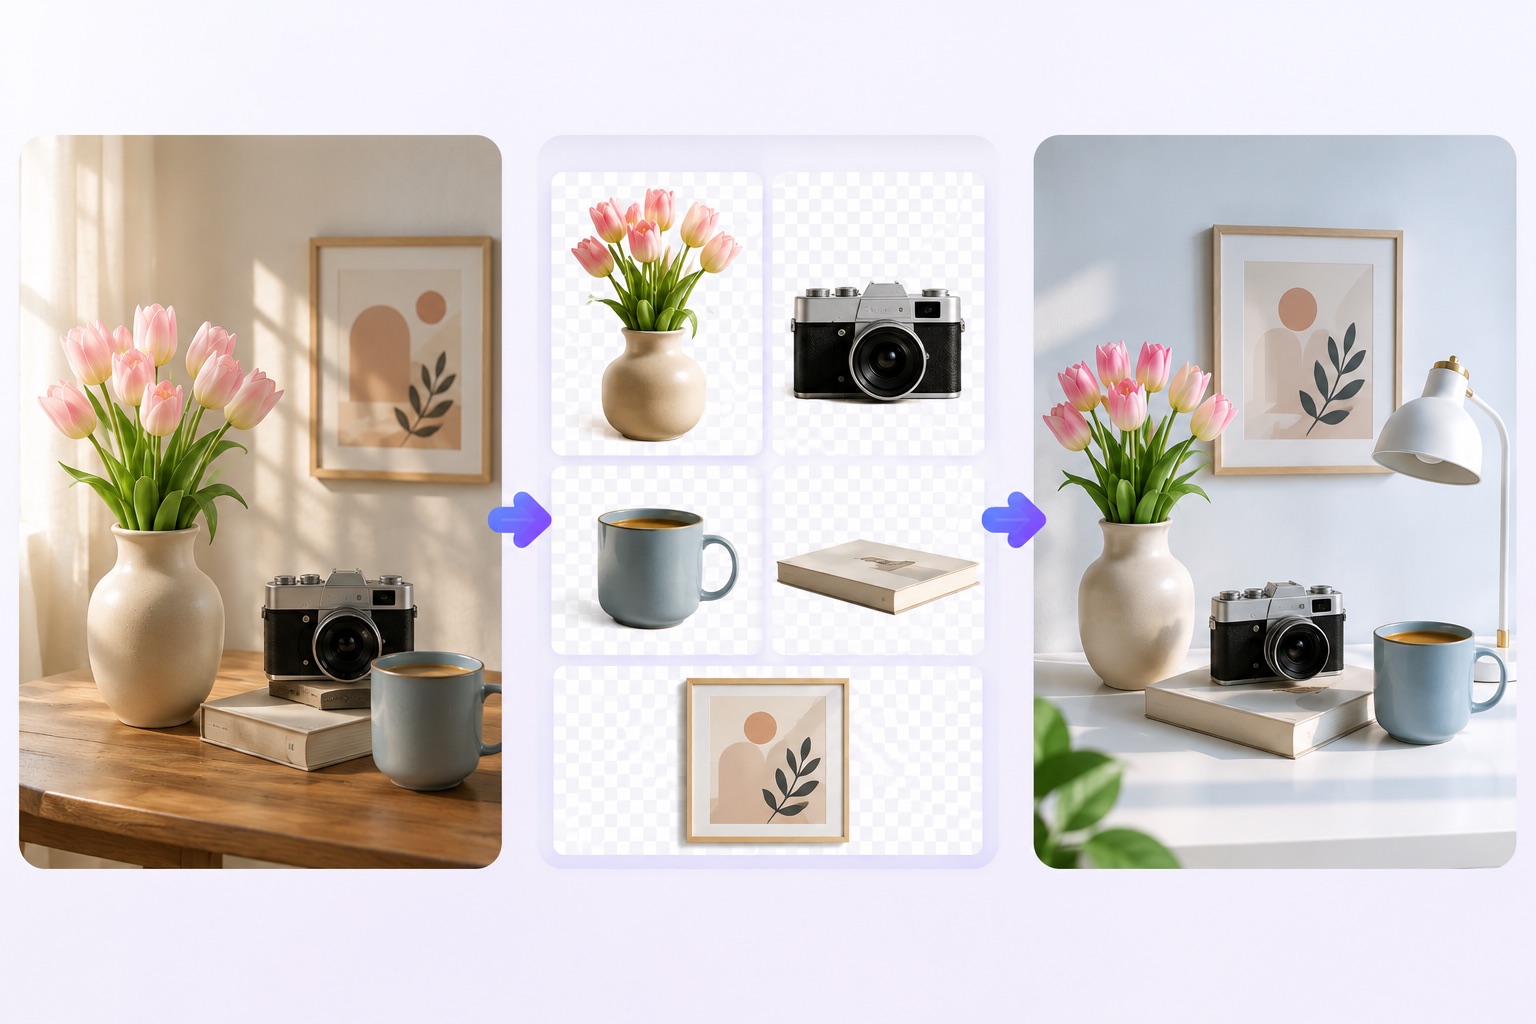
Adapt Marketing Assets
Extract individual visual elements from an existing creative asset so they can be reused across social posts, promotional graphics, presentations, or other campaign materials.
Explore Creative Variations
Image to layers makes it easier to test alternative arrangements or concepts using visual elements that already work well together.
Tips for Better Image to Layers Results
Make Your Selection Specific
When using the selection tool, keep the selected area focused on the complete element you want. Avoid including large parts of unrelated objects when possible.
Write Clear Prompts
When using a prompt, describe the element by its appearance and location. Mentioning color, position, or object type can help distinguish it from similar elements in the same image.
Use Images with Clear Visual Separation
Choose images in which the main elements are easy to distinguish. If the subject and background have very similar colors or textures, the AI may have more difficulty separating them accurately.
Avoid Excessive Object Overlap
When several objects overlap, the generated layers may contain mixed elements or incomplete boundaries. Simpler compositions are usually easier to separate and reuse.
Refine and Try Again When Needed
If the first result is not what you expected, adjust the selected area or make the prompt more specific. A small change in how you identify the desired element may produce a more useful result.
Frequently Asked Questions
What does image to layers do?
Image to layers analyzes an uploaded image and separates the visual elements you select or describe from the remaining image content. Instead of keeping every object merged in a flat image, it produces individual layers that are easier to download, organize, and reuse.
You can use the separated elements as standalone visual assets or bring them into AI Image in Piceditor.ai as references for a new composition.
How do I choose which image elements to separate?
You can identify the desired elements in two ways:
- Use the selection tool to draw a box around one or more objects.
- Enter a prompt describing the elements you want to separate.
When using the selection tool, include the complete object while avoiding too much unrelated content. When using a prompt, describe the element with details such as its color, position, appearance, material, or object type. For example, the red handbag on the table is clearer than simply writing bag.
Can image to layers separate multiple or complex elements?
Yes. You can select multiple elements from the same image. However, the quality of the results depends on how clearly those elements are shown.
Images with recognizable subjects, defined edges, good contrast, and visible separation between objects generally work best. Scenes containing overlapping objects, transparent materials, detailed backgrounds, shadows, or many small components may require more precise selections and closer inspection.
What should I do if the separated result is inaccurate?
First, check whether the selected area contains the complete object without including too much surrounding content. You can then narrow or adjust the selection and try again.
If you are using a prompt, add more specific visual information. Mentioning the element's color, location, material, or relationship to nearby objects can help the AI identify it more accurately.
You should also inspect fine details such as hair, fur, accessories, transparent areas, reflections, shadows, and overlapping edges before using the result.
Can I download and reuse the separated layers?
Yes. You can download the available layers individually and use them as visual assets in later projects. Clear filenames can make multiple elements easier to organize.
You can also bring the separated elements into AI Image in Piceditor.ai and use them as references when creating a new composition. Before reusing any result, make sure you have permission to process and use the original image.
Turn One Image into New Creative Possibilities
With image to layers, a finished image no longer has to remain a single, fixed composition. Select the elements you want, separate them from the rest of the picture, and turn them into reusable visual building blocks.
Whether you are preparing product assets, adapting marketing content, extracting a subject, or exploring an entirely new composition, Piceditor.ai helps you move from a flat image to a more flexible creative workflow.